World Card Making Day

We Had a great time celebrating World Card Making Day on Saturday. I decided to try and get a jump start on Christmas Cards. Mainly to get my rear in gear, since I've never sent out Christmas cards. Shhh, Don't tell anyone. I've justified to myself by saying "I've sent out cute Baby Announcements!" I guess that that was only a good excuse for the two years I had my kids. Well, you can get me on record for saying that I'm going to get them done this year!
These are the 10 cards we did. The cards were done in pairs. The ingredients for a pair or the card were almost the same. (At least using the same ink and cardstock, and supplies as their partner.) Some were easier than others, but all in all, everyone's turned out darling.

This was my sister's favorite card from the stack. No Stamping involved. She's such a complainer if she can't stamp something straight. Like some other people I know...You know who you are! "Don't be scared of the stamps!...It's just paper, you won't hurt it."
This card uses the new Felt Flurries from the Holiday Mini. Paper Piercing, White gel pen and White Grosgrain Ribbon.


Sorry about this bad photo of this one. We used Lovely as a Tree set and Sincere Salutations. Stamp the big tree 1st. Mask it with a post-it. Cut the third largest oval with the coluzzle and layer that over the masked tree. Stamp the group of trees with the same Mellow Moss ink and sponge a little Blue ink with a Stipple brush for the sky. Remove the oval mask and stamp greeting. Put the oval mask over and paper pierce around the group of trees. Tie Moss Gingham ribbon around card. Add dazzling diamonds (in the picture, they don't show up, but look really pretty IRL) to the ground and the trees.

Using the Punch Pals set make a cute wreath out of the Scallop Circe and the 1 1/4 " Circle punches. Only one ink Color on this one: Garden Green. Other sets used are: Taffy Alphabet and Canvas Background (again, sorry that in the photo, it doesn't show up)


Same Punch Pal Set. Stamped Penguin and Tree in Basic Black ink. Outlined images with markers and added Red Gingham ribbon for a scarf. I saw Brent Steel at convention a few years ago stamp this cute guy holding the tree. Thanks Brent for the inspiration!

This Cute little Gingerbread man is from the Deer Friends Hostess level 2 set. Isn't he cute?! Used a wheel for the stars on top and the Happy everything set. All Chocolate Chip ink.
I used my sideline Vicky's idea of dying Crystal Effects with Re-inker ink to make the shinny red nose for Rudolph. Just make sure to let the Crystal Effects dry for a long time. I'm talking 40 minutes before you even touch him to put the card together. I had my gals stamp this one first and finish it last!
This is a pocket card. Held together with Blue Grosgrain Ribbon and Blue Gingham ribbon. The Picture cut half of it off. I really need to improve my photography skills! Two Cool Dudes set for this one. Only Pacific Point Ink on this one. There was bashful blue ink in the Snowflakes wheel, though. Stamp two Snowmen, and cut one out and pop up with dimensional. There is scraps of cardstock to the left of the snowman, because my shipment of Pacific Point Stripped Ribbon didn't show up in time, and I felt like it needed something.

Same ink and stamp set for this one. Used 1/2" and 3/4" circle punches to punch this snowman out. Need to stamp him three times. But ain't he cute!

Here we did Versamark and Garden Green Chalk for an oldie but goody technique called Poppin' Pastels. But I had them to a cool fold for the card. Used our new Square Scallop Punch Love it!) and the Punches Three Hostess Level 1 set. See the Green Circle that has a Slit Punch inside it that hold the red Cardstock down, til you pull the card open? It's the Inside Circle that you punched out of the Wreath for the "Joy" card above. I wasn't going to waste it! LOL.

Versamark on Garden Green and punched out with the same Scallop Square punch. Used dimensionals to attach. Red Riding Hood Ink and Ribbon. Another new punch added to the bottom...The Scallop Edge Punch! Added White gel pen dots. Easy Peasy.
Hope this inspires you (and me) to get those Christmas cards done early so you're able to enjoy time with those you love (and have to get together with) this upcoming the holiday season.

Father's Day Cards


I made some of these father day cards. I learned how to fold the ties here.
The white shirt card takes one cut about an inch down the middle of the front of the card and then folded from that point to the edges.
The blue shirt card takes two cuts on the outside edges. There is a video tutorial in the last 45 seconds of this video. Easy Peasy.

Fresh cuts Card

This card only took me 2 min. to make! I even had to put my stamps together! Seriously. The die cuts stamps and card make this super quick! I stamped the large background in Certainly Celery. And the saying in Basic Gray. I used out our 5-petal flower punch with Basic Gray cardstock and but a brad through the middle.


I also whipped up another card with one of the leftover pieces that you punch out from your laser cut flower. I thought it looked like the flame of a birthday candle. I just sponged it with a little barely banana ink. I just used scraps that I had laying around from other cards to throw this one together. I always save all my scraps, "thinking" I'll use them, and I finally did!

Stampin'Up Dates to Remember

Retirement list will be posted on June 15th.

The mini occasions collections has been extended until June 30th.

Retiring accessories list will be posted July 21st.

The Spring and Summer catalog order period has been extended to August 10th.

New Fall and Winter Catalogs arrival by August 11th.

Sale-A-Bration dates for 2009 are to be February 1st. -March 31st.

Die Cut Stamps and Cards!

While the release of the new catalog is still a couple of months away, Stampin' Up! is offering us a sneak peek of two great products to come. The Fresh Cut stamp set is a design that is versatile and stylish.

All the stamps are die cut! This feature helps save you time and gets you stamping perfectly every time. In addition, the Fresh-Cut Notes are like no other precut cards we've ever offered. The notes package includes 15-4" x 4" laser-cut note cards with envelopes. The pair complements each other perfectly for a one-of-a-kind gift card or an exceptional hand-delivered thank-you card.
For a limited time when you purchase the brand new, die-cut Fresh Cuts stamp set, and add on the coordinating Fresh-Cut Notes for only $5!
View More Details

25% off Card Kit Bundle

Put down the phone, turn off the computer, and break free from the 'e'!Remember when you got letters in your mailbox instead of your inbox? On June 25, 2008, Stampin' Up! is taking the day to unplug and unwind, and reconnect on a personal level with friends and loved ones through handmade cards. And we invite you to eScape with us throughout the month of June!
Reconnect with your "wireless network" by attending an eScape event or hosting one of your own! Take advantage of the 25 percent discount on select items in the eScape bundle to help you create that special message from the heart.
eScape Bundle (item 113700):
(click on products to view in our online catalog)
Circle of Friendship stamp set (pg. 143) $17.95
Love Notes assortment (p. 167) $8.95
Rose Red Classic Stampin' Pad (p. 165) $5.25
Very Vanilla 5/8" grosgrain ribbon (p. 191) $7.95
Total (non-bundled) $40.10
eScape Bundle price $30.00


We've got a great way to expand your toolbox! For the entire month of May, buy a Stampin'Up kit at such a great deal! Most people get the kit to join Stampin' Up! as a demonstrator, but some do it just get lots of stuff for their dollar, and not to start their business.
This month, get 20% off the Starter Kit (reg. low price of 199), PLUS a free tin of Hodgepodge Hardware (p. 188) from the Spring-Summer Collection 2008 (a $27.95 value!).
The Starter Kit (p. 209) comes complete with all the tools you'll need to create wonderful works of art or to start a successful business--$359 worth of stamping and business supplies for only $159! Plus S&H is never added to the Kit! Construct your kit by selecting the nuts and bolts of your stamping supplies, and take your toolbox to the next level!
Contact me at ruthbschow@msn.com get $40 off the Starter Kit and FREE Hodgepodge Hardware!

Pick your own Starter Kit-items must be equal or lesser value
$30.95 -Stamp set
$30.95 -Stamp set
$20.95 -Stamp set
$12.95 -Stamp set
$13.95 -Stamp set
$6.50 -Stamp wheel
$3.95 -Stampin’ Around® Self-Inking Handle (regular)
$5.25 -Ink Cartridge (regular)
$24.95 -Stampin Pastels (Chalks)
$7.95 -1 package Assorted Cardstock Family (8 ½ by 11”)
$7.50 -Any Naturals (8 ½ by 11”) Cardstock
$6.95 -SNAIL Adhesive
$19.95 -Craft & Rubber Scissors
$14.95 -Stampin Scrub
$3.95 -Stampin Mist
$7.50 -Versamark Pad
$9.95 -Blender Pens
$5.25 -Classic Stampin’ Pad
$27.95 -Hodgepodge Hardware
$296.50 -Total Stamp Products
Business Supplies
$28.00-Catalogs (8)
$3.95-First Impressions DVD
$1.40-Hostess Benefits Forms (10)
$6.50-Customer Order Forms (50)
$3.95-Guest Invitation Postcards (100)
$2.95-Mini Catalogs (8 – when available)
$1.50-To My Hostess Envelopes (10)
$2.50-Recruit Folders (5)
$4.95-Recruit Brochures (20)
1.45-Starter Kit Order Forms (5)
Hostess Benefits Order Forms
Exchange Order Forms
Getting started packet
Getting started DVD
$57.15-Subtotal of Business Supplies
Plus there isn't S&H charges on the Starter Kit saves you...$35.36
For $50 extra Add on Scrapbook Kit pick out your favortite
$19.95-Linen Post Album / 6" x 6" Brag Book
$8.95-Assorted color card stock (12" x 12")
$27.95-Alphabet Stamp Set
$19.95-Simply Scrappin’Kit®
$7.50-Craft Stampin’ Pad
$3.25-Stampin’ Write® Journaler
$87.55-Subtotal of Scrapbook Kit for $50.

Seriously, how could you pass up a deal like this???

Plus buy your supplies at a discount, have access to the demo website with tons of ideas and information, a monthy magazine with full color samples and an upline like me!!

Call or e-mail me with any questions---without any presure, I promise!

New Promotion!

This month, all of the Stampin' Up! chipboard products are 25% off with a $35 order. NO LIMIT! You can order as much as you want, including chipboard clipboards and a selection of books! Here is a complete list with promotional prices (all items are on pages 178-179 in the Spring/Summer Collection):


109181 On Board Blossoms & Basics $11.21
109179 On Board Ginormous Pieces $11.21
107925 On Board Bitty Book $7.46
108495 On Board 5" x 5" Art Journal $5.21
107065 On Board Art Journal (5-3/4" x 8-3/4") $7.13
107307 On Board Accents $9.71
109182 On Board Lots of Letters $9.71
109180 On Board Simon Upper $9.71
107306 On Board Simon Lower $9.71
109192 On Board Clipboard (13" x 7-1/2") $11.96
109190 On Board Clipboard (9" x 9") $5.96
109191 On Board Clipboard (4-1/2" x 9") $4.88
110713 On Board Book Basics Large $5.96
110712 On Board Book Basics Small $4.46

Plus when you buy the Cutting Mat (pg.184) you get the hobby blade plus 5 refill blades for FREE. It's "exactly" what you need for covering your chipboard projects with Designer Series Paper!

9x9 Tabletop Scrapbook Class May 30th


Come and make a darling a 9x9 Tabletop Scrapbook. Using our Chipboard and Home Again Simply Scrappin' Kit. Great for Dad's and Husbands for Father's Day!
There actually isn't any stamping involved with this class! Everything will be cut out and ready for you to put together with explicit instructions for you to take home and make more!!!
Plus there will be extra supplies to make cards or add to additional scrapbook pages!
The Class is Friday, May 30th. (choose a time) 9 am, Noon, or 6 pm. My house.
The cost is $20 and the sign-up deadline is the 23rd. If you bring a friend, you will get a gift from me. Bring more than one friend and I'll knock off $5 for every friend you sign-up plus a gift. If you bring more than 4 friends, well, I will have to figure that one out!

abc chipboard book

Here is a book I made out of the On Board Bitty Book and chipboard Letters from Stampin'Up. I covered the book with Designer Series paper and sanded the edges of the book to take off the excess paper. Gives a clean finished edge. I used Craft ink to dye the "a" and "c" letters. The "B" I also covered with paper...except the inside peices I also used Craft ink on.

The book comes with page protectors and I wheeled Whisper White CS with "My ABC's" wheel and wrote in the letters. Yes, wrote in the letters! The ABC Alphabet by SU fits perfect on the wheel lines, but I don't have that set! Hard to believe! If anyone would like to help me in reminding my husband that I DO need more stamps, I can surely give you his e-mail address! hehe. I made this so Bailey could use a dry erase marker to practice writing her letters (the page protectors make it possible to wipe off and write over and over again.) But alas, I haven't put all the pages into the book yet and she is getting so good at writing even without this cute book, I might just have to be selfish and keep it all to myself!


Here is the back of the book. For the Images that cordinate with the letters, I stamped and colored then punched out with the 3/4" circle punch. I used the word window punch, folded in half and then adhered the circles on either side of the page.

A Hip Hippo-ray!


Isn't this hippo so cute? He's out of a set named Pun Fun. It's one of the 6 sets that if you purchase the stamps, you get the jumbo wheel that cordinates for FREE! You have til the end of the month to take advantage of this promotion!

Three Colums! Yea!!

Does my blog look different to you? I have been trying to add a side column on the left and finally did it!!!! Don't ask me how, I just messed around with the HTML forever! I've tried to change it before and haven't been successful. Anyway, let me know if you like the layout!


Here is the slider card close up, since my video skills aren't up to par, yet!

Easter Sunday Girls

Here are the girls Easter Sunday...ready to go to church, but not without a fight! They look all smiles now, but Bailey sure didn't want to put that skirt on! I had the girls clothes all laid out and she came out of her room in something else and I told her that I let her choose what she wants to wear (within reason) every Sunday, but this Sunday, you are wearing what I picked out for you and Sloan. Needless to say, after quite a few tears and a while in timeout she put it on and surprisingly smiled for the camera!


Here are a few projects that I have done this month. I admid I'm a little slow at taking pictures and putting them on my blog. HOW do you other bloggers do it? Some people are great at posting them before the holiday, but with me, I just have to say "better late than never"!

Free Wheelin' Promotion

This promotion runs Mar 18th through the end of April. I Love wheels, and Jumbo wheels at that! How great to get them free with your stamp set! I've been trying to upload my flyer here but alas my computer skills or lack of, are disapointing me. But I have learned how to link it, so click here to see!
If anyone out there knows how to make my blog act like Diane's blog, I swear I will give you whatever you want! Seriously, make me an offer! Does she have a computer programer live with her?!? Someone enlighten me! I love how you can just click on her catalog, and it takes you right there! I've had to just put in a link above the picture of mine. Anyway, I have learned a lot just by trial and error on my blog, but it sure does take a while for me to figure it out!

Testing out my homemade Light box

Hey I'm trying out my Light box I made out of a cardboard Box~! I think it's going to work great!


Here is a card I made using a few techniques.

  1. Dazzaling Diamond Dust. Cover the cardstock with the stamped images (old olive flower, temp.turquoise butterfly and rose red heart from Priceless stamp set) with Versamark and cover with Irridecent Ice Embossing Powder. Heat.
  2. Use the A-3 setting on your Crop-a-dile to dry emboss dots along your rose red cardstock
  3. Use your corner rounder with the guard off to make scallops
  4. Color just the sides of your ribbon with a marker to have a custom color match.

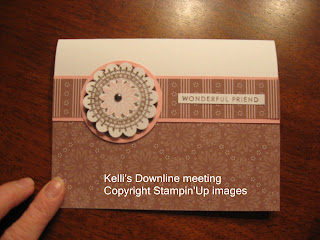
Kelli's meeting

Here are some pictures I took from my upline Kelli's meeting last month. I have the best upline and sidelines! They come up with the greatest ideas! Hope you enjoy them as much as I did!


A beautiful card made by Melissa given to Vicky with one of my favorite sets: Embrace Life.


How cute are these? The picture doesn't do Amy's eggs justice! They are so sparkly in real life. And the jar has our rub-ons on it too!


Love this color combo!


Here's a stamp set that is free with Sale-a-bration!


I still can't get enough of the scallop punch or the Designer Series Paper! (Berry Bliss DS used here)

Here is a cute bag made with a set out of the new Occasions mini catalog and the Ginger Blossom DS paper.

TIN OF TEN CARDS


Here is a picture of the tin part of the project for my stamp camp. We will be using Designer Series paper to cover a tin box and make ten cards (envelopes included!) But that's not all...you will also make cute dividers to go inside the tin, too! This is a great gift for Mother's Day! Use as a reciepe box or card organizer.
It's Friday April 25th. Cost:$20. There will be choices of Paper also. Contact me to reserve your tin!

Open House Friday the 8th of Feb.


Hey everyone,
Here is the project for my Open House. Come by and look at the New Catalog, Learn some fun techniques, and make a Cute Valentine box for someone Sweet!

Sloan and the bug

Make sure and scroll down and pause the music before starting the video.